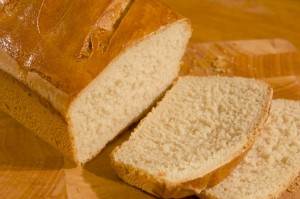
Sourdough bread is an amazingly simple thing to make, but people who haven’t tried it can often find the whole idea quite daunting. It only has three ingredients: flour, salt and water. What could be easier?
The big thing about sourdough is that it doesn’t contain any yeast – well, not regular baker’s yeast anyway. Instead, you use a sourdough starter – this is a mixture of flour and water in which you have allowed the natural yeasts present all around us to flourish and grow.
To make sourdough bread, you first need your sourdough starter. A starter is simply home-grown yeast culture. If you know somebody who makes their own sourdough, you can alway ask to borrow a bit of their starter, and use that to kick-start your own, but making your own starter from scratch is very straightforward.
Some people faff about with all sorts of things when making sourdough starters, adding grapes, raisins, yoghurt, old socks and other such titbits in an effort to get things going. In reality, you don’t need any of that stuff (in fact, I believe they will actively hinder a good starter) – all you need is flour and water, and a little patience.. I’ve made a number of these over the years, and they’re really very easy. All it takes is a little time.
Here’s what I do:
Take a cup of flour and a cup of water, and mix into a smooth batter. Don’t worry about the odd lump or two though, the starter will make short work of those. For the flour, I tend to use organic white bread flour, but you can use whatever takes your fancy. If you want to hurry things along a little, you could, for this initial mixing, replace half of the flour with rye flour – that certainly gives things a kick start. Rye flour typically has an abundance of natural yeasts present and you’ll get a vigourous starter much more quickly.
Some people say you shouldn’t use tap water, but in my experience, it hasn’t been a problem. Sometimes I have used tap water that was then boiled and then allowed to cool—actually, (i.e. what was left in the kettle from when I had a cup of tea earlier), but mostly I just use it straight from the tap.
Finally, put the batter into a jar. Glass is best, simply so you can see what’s going on inside. Make sure you don’t seal the jar though. As the yeasts feed, they give off gas as part of the process, and so you need to allow these gases to escape. I use an old preserving jar and removed the rubber ring from the seal so the lid is loose fitting.
Place the jar somewhere warm. It shouldn’t be hot, a comfortably warm room temperature should do nicely. I just leave the jar on the side in the kitchen on the surface above the hot water tank where it stays reasonably snug.
Leave overnight.
After the starter has sat around for around 24 hours, you will need to feed it. By now it, will probably have separated a little – there will be a thin watery liquid sat on top. That’s good – it’s a sign that there’s something going on in there. Just stir that back in.
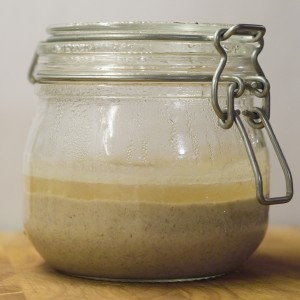
For the first feed, pour the starter into a bowl and add a half cup of flour and half cup of water. Again, I often use half rye flour and half organic bread flour at this stage. Beat the mixture until it’s all thoroughly mixed together and pour back into the jar. Put the jar back in its warm spot and sit back for another 24 hours.
Leave overnight.
From now on, the feeding ritual looks something like this: Pour half the starter into a bowl and discard the other half. Wash out the jar (it starts to get a bit gunky if you don’t wash it out occasionally). Add half a cup of flour and half a cup of water to the starter in the bowl and beat until smooth. Return the starter to the jar and wait another day. Repeat for the next few days and hopefully the starter will grow stronger.
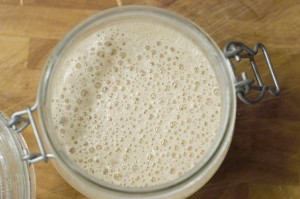
After a couple of days of this, you should have a working starter. Once you’ve got your starter, you should keep it in the fridge where it will lay pretty much dormant for quite some time. Once every week or two, take it out and give it a feed, just to keep it ticking over.
Now it’s time to go make some bread. Note that proper sourdough bread takes time to make, it needs time for the flavours to develop. This isn’t your common-or-garden store-bought pappy bread. This is proper bread. You should start this recipe in the morning of the day before you want to bake.
Ingredients (makes 12 buns or 2 loaves):
- ½ cup sourdough starter
- 6 cups strong white flour
- 2¼ cups water
- 1½ tsp salt
Mix the starter with 1½ cups of flour and one cup of water in a large mixing bowl. Cover with a cloth and leave at room temperature for 12 hours.
Add 1 cup of flour and ¼ cup of water. Mix well until smooth. Leave for 12 hours.
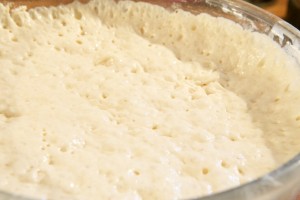
If all’s going well, the dough should by now be looking reasonably active. If you skimped on size when I said ‘large mixing bowl’, you might well be regretting that decision.
Punch the dough down, add 1 cup of water and mix it in, together with the salt. Put one cup of flour aside to flour the board during kneading and add 2½ cups of flour into the bowl, half a cup at a time, kneading it in as you go. Once it starts to get too stiff to mix in the bowl, turn it out onto the floured board and continue kneading until all the flour is mixed in.
Don’t skimp on the kneading – it’s an important part of the process. Expect to spend around ten minutes on it, maybe a little more. After a while, you should feel the dough develop a smooth elasticity – that’s when you know you’ve done enough.
Now, divide the dough into 12 round balls, and place them on a floured baking tray. Cover with a cloth and leave them to prove until they’re doubled in size – about three to four hours. Once risen, if you’re feeling flashy, you could paint the tops with a little beaten egg or milk and sprinkle on a few poppy or sesame seeds, but they’re just as nice left plain.
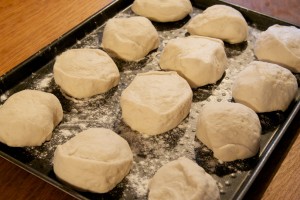
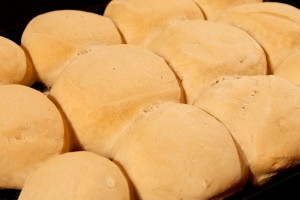
Bake in a preheated oven at 190°C (375°F), or 180°C (355°F) if you’re using a fan oven, for around twenty five minutes. Once they’re done, remove from the oven and place on a wire rack to cool.
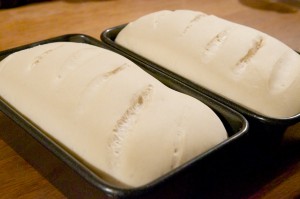
If you prefer loaves, instead of dividing the dough into 12, divide it into two and place in two 1½ lb loaf tins. Slash the top of each loaf a couple of times with a sharp knife and leave until the dough rises above the tops of the loaf tins. Bake as above, but for around 40 minutes.
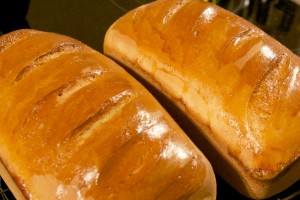
Home-made sourdough bread is absolutely delicious, and if you want to experiment more, there are very many different recipes to try out. The internet is full of them, so you shouldn’t have any difficulty tracking some down. I bought this book a little while ago, which has a comprehensive description of sourdough baking and many recipes – it’s well worth a read if you want to learn more.

When do you add in the salt?
Ah, sorry, I missed that bit – add it in the final mixing together with the water. I’ve updated the post to include that now.
I just made this bread today. Pulled it out of the oven right before having to leave for work, so I haven’t tasted it yet. It does look really good. I did one with and another without egg on the top and the one with egg really looks a lot better with the golden crust.
Thanks for sharing this. I’m now looking for more recipes and books to learn more about sourdough.
Glad you like the way it turned out – hope it tastes as good as it looks!